Designing AV systems can be a detailed and time-consuming process. From floor plans and device placement to signal flow and documentation, every step requires careful planning. Professional AV design software simplifies these tasks, but many users do not fully leverage all its features. By using the software strategically, system integrators can save time, reduce rework, and improve overall project efficiency. These tips will help both beginners and experienced professionals get the most out of their AV design tools.
1. Start with a Clear Project Plan
Before opening your AV design software, take time to outline the project requirements. Collect details about room dimensions, device lists, client preferences, and technical specifications. Knowing exactly what you need to achieve reduces unnecessary trial and error in the software. A clear project plan ensures that every action you take in the software is purposeful, saving time and improving accuracy.
2. Use Prebuilt Templates
Most professional AV design software comes with prebuilt templates for common projects such as conference rooms, classrooms, or auditoriums. Using these templates allows you to start with a structured layout instead of building from scratch. This feature saves hours of setup time and ensures that your design follows industry best practices.
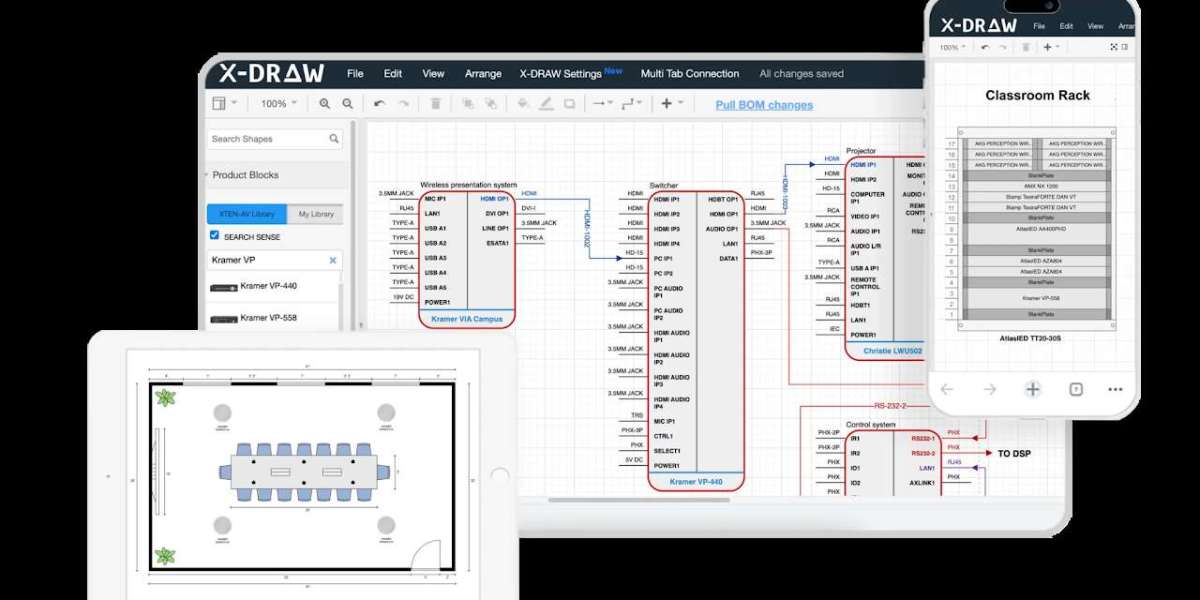
3. Take Advantage of Device Libraries
Audio visual design Software often includes extensive libraries of devices, including displays, projectors, microphones, and speakers. Using these preconfigured devices saves you from manually entering dimensions, specifications, or connection types. Drag and drop devices directly from the library to your floor plan for fast and accurate placement.
4. Automate Cable Management
Manually creating cable lists and routing diagrams can be tedious. AV design software provides tools to automate cable management, including automatic labeling, length calculations, and color coding. Automating this process reduces errors and frees up time to focus on other critical aspects of the design.
5. Use Layers and Groups for Organization
Complex projects can become overwhelming if every device, cable, and component is visible at once. Use layers and grouping features in your AV design software to organize elements logically. For example, keep audio, video, and control components on separate layers. This makes it easier to edit specific parts of the design without disrupting other areas.
6. Utilize 3D Visualization
Many professional platforms include 3D visualization tools. These allow you to see how devices, furniture, and equipment will fit in the actual space. Using 3D views can help identify potential conflicts or design issues early, saving time on revisions and preventing problems during installation.
7. Leverage Cloud Collaboration
AV projects often involve multiple team members, including designers, project managers, and installers. Using cloud-based AV design software allows all stakeholders to access the project in real time. Changes are updated automatically, eliminating version control issues and speeding up collaboration. This feature is especially useful for teams working across different locations.
8. Generate Documentation Automatically
Creating floor plans, rack diagrams, signal flow charts, and cable lists manually is time-consuming. Professional AV design software can generate detailed documentation automatically. Use this feature to produce professional, accurate documents quickly. Having ready-to-use documentation reduces errors and improves communication with clients and installation teams.
9. Use Shortcuts and Custom Commands
Familiarize yourself with keyboard shortcuts and custom commands available in your AV design software. Shortcuts speed up repetitive actions, such as zooming, placing devices, or drawing connections. Custom commands allow you to automate common tasks specific to your workflow. Learning these tools can save significant time over the course of a project.
10. Review and Validate Early
Validating your design early in the process helps avoid time-consuming corrections later. Many AV design software platforms offer real-time error checking, signal verification, and conflict detection. Use these features to catch mistakes before finalizing the layout. Early validation reduces installation delays and ensures that the system functions as intended.
Conclusion
Time management is critical in AV projects, where accuracy and efficiency are equally important. By following these ten tips, system integrators and AV professionals can maximize the potential of their AV design software, saving hours of work while maintaining high standards.
XTEN-AV and similar professional platforms provide the tools needed to streamline design, automate tasks, and improve collaboration. Leveraging audio visual design Software effectively allows professionals to complete projects faster, reduce errors, and deliver high-quality results. With smart use of these features, AV integrators can stay competitive and meet the growing demands of modern AV installations.
Read more: https://techwaveav.alboompro.com/post/how-to-design-the-perfect-av-system-layout