Step-by-Step Guide: Installing Curb Moulds Like a Pro
Installing Curb Moulds may seem like a straightforward task, but achieving a professional finish requires careful planning, precise execution, and attention to detail. Whether you are a DIY enthusiast or a contractor looking to improve your workflow, this step-by-step guide will walk you through the entire process of installing curb moulds effectively and efficiently. By the end of this guide, you will have all the knowledge and techniques needed to install curb moulds like a pro.
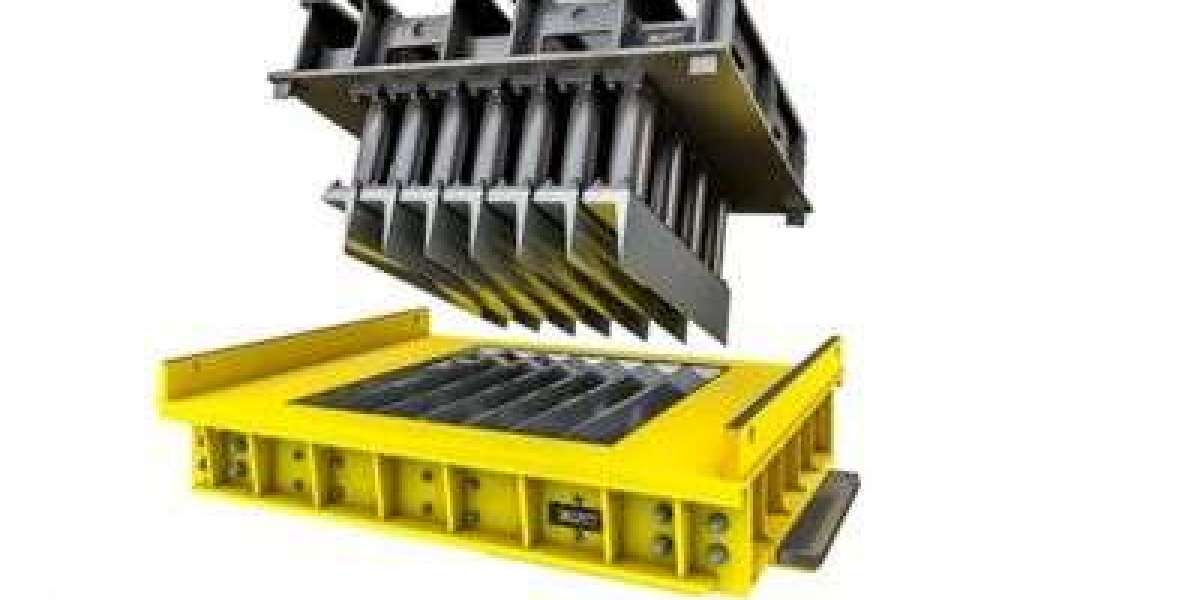
What Are Curb Moulds?
Curb moulds are specialized forms used to shape concrete curbs. They provide structure and precision, ensuring that the final curb is straight, level, and aesthetically pleasing. Available in various sizes and materials, curb moulds are designed to accommodate different curb designs, from standard rounded edges to custom decorative finishes. Proper installation of curb moulds not only improves the appearance of your project but also enhances durability and safety.
Tools and Materials You’ll Need
Before starting your project, gather all necessary tools and materials. Using the right equipment ensures a smooth installation process and professional results.
Materials:
Curb moulds (PVC, wood, or metal depending on your preference)
Concrete mix (pre-mixed or custom blend)
Gravel or crushed stone for the base
Form release agent (to prevent sticking)
Tools:
Tape measure
Level (laser level recommended for precision)
Hammer and nails or screws
Wooden stakes
Rubber mallet
Concrete trowel
Shovel and rake
Safety gear (gloves, safety glasses, dust mask)
Having all your materials and tools ready will reduce delays and help maintain consistency during the installation process.
Step 1: Planning and Measuring
Successful installation of curb moulds starts with careful planning. Begin by determining the layout of your curb. Consider the following:
Length and shape of the curb
Location of driveways or intersections
Required slope for drainage
Mark the curb layout using stakes and string lines. Ensure the string lines are taut and accurately represent the desired shape. Precise measurement at this stage reduces errors later in the installation process.
Step 2: Preparing the Ground
A strong foundation is essential for a durable curb. Follow these steps:
Excavate the area along the marked layout to a depth of 6–8 inches.
Remove any grass, roots, or debris.
Fill the excavated area with a 3–4 inch layer of compacted gravel or crushed stone.
Use a tamper to level and compact the base.
Proper ground preparation prevents cracking and shifting of concrete over time, ensuring your curb moulds produce a long-lasting result.
Step 3: Setting Up the Curb Moulds
Once the ground is prepared, you can set up the curb moulds. This step is critical to achieving straight, clean edges.
Apply a thin layer of form release agent to the inside of the moulds.
Place the curb mould along the string line or layout marks.
Secure the mould with stakes, ensuring it is level and firmly in place.
Check for alignment using a level; adjust as needed before adding concrete.
It’s important to take your time at this stage. Misaligned moulds can result in uneven or crooked curbs that are difficult to correct once the concrete sets.
Step 4: Mixing and Pouring Concrete
Proper concrete mixing is essential for strength and workability. Follow manufacturer guidelines for water-to-mix ratios. Aim for a consistency that is neither too dry nor too runny.
Pour the concrete into the curb moulds, starting at one end and working your way down.
Use a shovel or trowel to spread the concrete evenly inside the mould.
Tap the sides of the mould gently with a rubber mallet to remove air bubbles and ensure concrete settles into corners.
Even distribution of concrete ensures a smooth, solid curb once the moulds are removed.
Step 5: Leveling and Smoothing
Achieving a polished finish requires careful leveling and smoothing:
Use a trowel or screed board to level the surface of the concrete.
Smooth the top and sides of the curb, paying attention to edges and corners.
Check alignment and height with a level periodically.
Proper finishing not only enhances aesthetics but also improves durability by reducing weak spots prone to cracking.
Step 6: Curing the Concrete
Concrete curing is crucial for strength and longevity. Follow these tips for optimal curing:
Cover the concrete with plastic sheeting or wet burlap to retain moisture.
Keep the concrete damp for at least 48–72 hours.
Avoid heavy traffic or stress on the curb during the curing period.
Patience during curing ensures your curb moulds produce a finished product that will last for years.
Step 7: Removing the Moulds
Once the concrete has sufficiently cured, carefully remove the curb moulds:
Loosen stakes and gently pull the moulds away from the concrete.
Tap the sides if necessary to release the mould without damaging edges.
Inspect the curb for imperfections and touch up with a trowel if needed.
By carefully removing the moulds, you preserve the crisp lines and professional appearance of your curb.
Step 8: Maintenance Tips for Longevity
To ensure your curbs remain strong and attractive:
Seal the concrete to protect against water and stains.
Inspect for cracks regularly and repair promptly.
Avoid using de-icing salts near newly installed curbs.
Keep the surrounding area clean from debris that could cause erosion.
Proper maintenance prolongs the life of your curbs and maintains the investment in your project.
Pro Tips for a Professional Finish
Always check for proper slope to prevent water pooling.
Use high-quality moulds that are reusable and resistant to warping.
Consider adding decorative finishes or textures while the concrete is still wet.
Work in sections if installing a long curb to maintain consistency.
Following these expert tips ensures your curb installation not only functions well but also enhances the overall appearance of your property.
Conclusion
Installing curb moulds like a professional requires attention to detail, proper preparation, and patience. From planning and measuring to pouring, finishing, and curing, every step plays a critical role in achieving a high-quality curb. By following this step-by-step guide, you can confidently install curbs that are durable, visually appealing, and built to last. With the right tools, materials, and techniques, even a DIY enthusiast can achieve results that rival professional contractors.
Investing time in proper installation and maintenance ensures your curbs not only look great but also provide long-term functionality and safety. With practice, installing curb moulds becomes a skill you can apply to a variety of landscaping and construction projects, delivering professional results every time.