Determining the correct projector distance is crucial for a clear and immersive viewing experience. Many users ask why is my projector blurry when trying to project onto a large 100-inch screen. Incorrect placement can result in soft images, poor focus, and reduced brightness. In this blog, we will explain how to calculate the correct projector distance for a 100-inch screen and provide tips on how to fix blurry projector images caused by improper setup.
Understanding Throw Distance
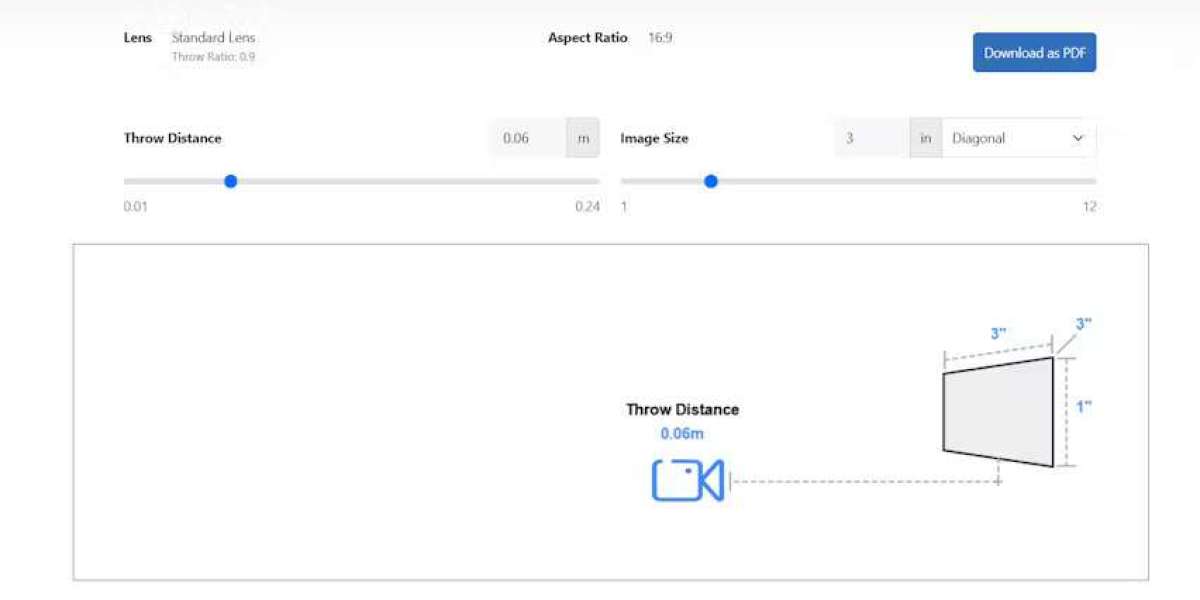
The throw distance is the space between the projector lens and the screen. Each projector has a specified throw ratio, which tells you how far back the projector should be to achieve a particular screen size.
Formula:
Throw Distance = Screen Width × Throw Ratio
For a 100-inch diagonal screen, the screen width is approximately 87 inches (7.25 feet). If your projector has a throw ratio of 1.5, the ideal distance is:
87 inches × 1.5 = 130.5 inches (~10.8 feet)
Placing the projector too close or too far can make my projector blurry or distorted, even if the focus is adjusted.
Short Throw vs Standard Throw Projectors
Short throw projectors can produce a large image from a few feet away. While convenient for small rooms, short throw lenses are sensitive to alignment. Incorrect positioning may cause the image to appear soft.
Standard throw projectors need more distance to achieve a 100-inch image. Placing them too close reduces image size, while placing them too far can reduce brightness and sharpness, making projector blurry.
Adjusting for Ceiling or Tabletop Mounting
Ceiling-mounted projectors require precise distance calculation to ensure the projected image fits the screen. The lens should be level with the screen’s center or use lens shift for vertical alignment.
Tabletop placement must also account for throw distance and tilt. Excessive tilt introduces keystone distortion and can make my projector blurry.
Factors Affecting the Correct Distance
Screen gain and type – Higher gain screens reflect more light and may allow slight adjustments in distance without reducing sharpness.
Ambient light – Bright rooms may require a slightly closer placement to maintain perceived brightness and sharpness.
Resolution – Projecting low-resolution content on a large screen can appear blurry, regardless of distance.
Room dimensions – Ensure the projector fits comfortably in the room while maintaining the calculated throw distance.
How to Fix Blurry Projector Images Related to Distance
Verify the projector’s throw ratio and adjust the distance accordingly
Use a laser distance meter for precise placement
Avoid extreme tilt or off-center positioning
Adjust focus after positioning at the correct distance
Consider a zoom lens to fine-tune image size without moving the projector
Tips for Optimal 100-Inch Projection
Always test with high-contrast content to verify sharpness
Mark the ideal projector location on the floor for consistency
Use lens shift for vertical alignment to reduce keystone corrections
Keep the projector stable to prevent accidental movement during use
Conclusion
The correct projector distance for a 100-inch screen is determined by the projector’s throw ratio, screen width, and room layout. Users often ask why is my projector blurry, projector blurry, or my projector is blurry, and many of these issues are caused by improper placement. By calculating throw distance accurately, adjusting mounting height, minimizing tilt, and using lens shift or zoom properly, you can fix blurry projector images and achieve a sharp, bright, and immersive home theater or office setup. Correct distance is a key step in creating the ideal viewing experience and eliminating common projector problems.
Read more: https://avfusionhorizon.weebly.com/blog/troubleshooting-sensor-based-focus-errors